Where do I start?
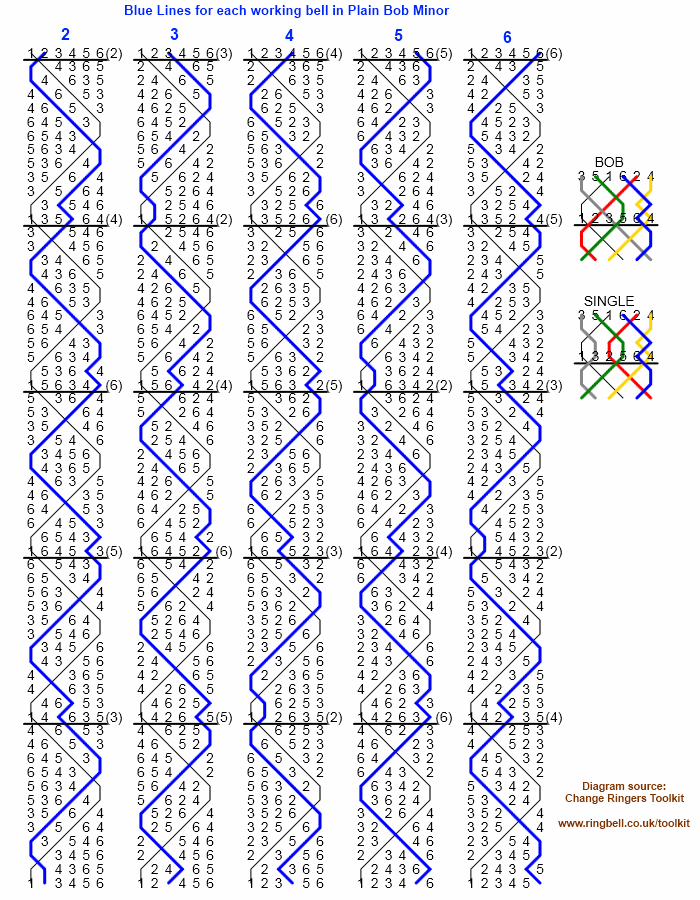
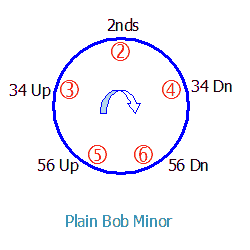
This diagram shows the order of work in the method. The accompanying table shows the first few changes in the method and the first work you do as you move around the circle.
 |
Bell No |
Starts With |
Starting Places |
First Work |
|---|---|---|---|---|
| 2 | In to Lead | (2)LL23456.. | 3/4 Down | |
| 4 | Hunt In | (4)32LL234.. | 5/6 Down | |
| 6 | Hunt In | (6)5432LL2.. | 5/6 Up | |
| 5 | Out to the back | (5)665432L.. | 3/4 Up | |
| 3 | Out to the back | (3)4566543.. | 2nds |
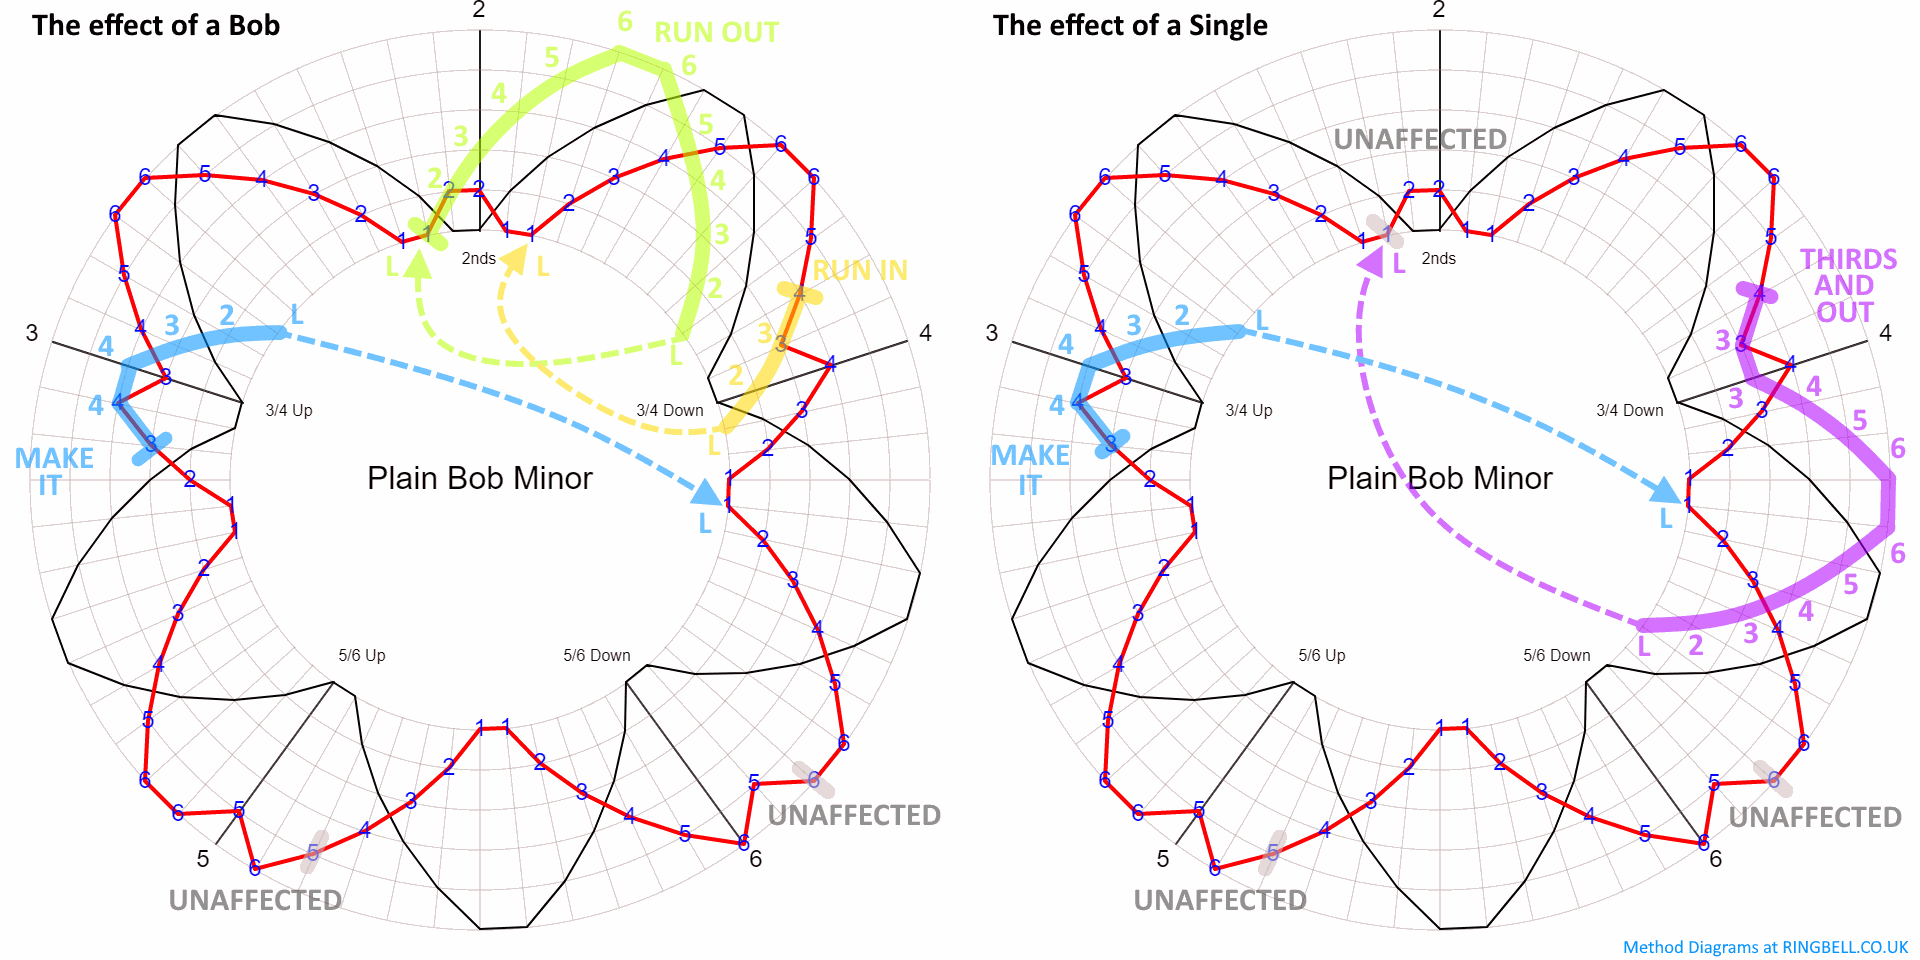
 3/4 Down
 Run In
 Make 3rds and Out
 2nds
2nds Run Out
 3/4 Up
 Make 4ths and In